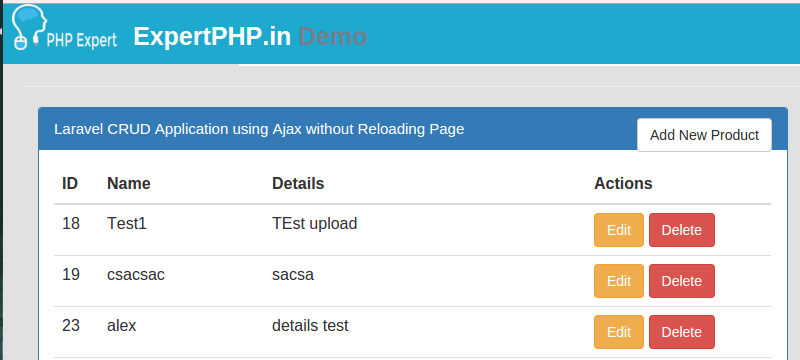
Laravel 5.2 CRUD (Create Read Update Delete) Example from Scratch
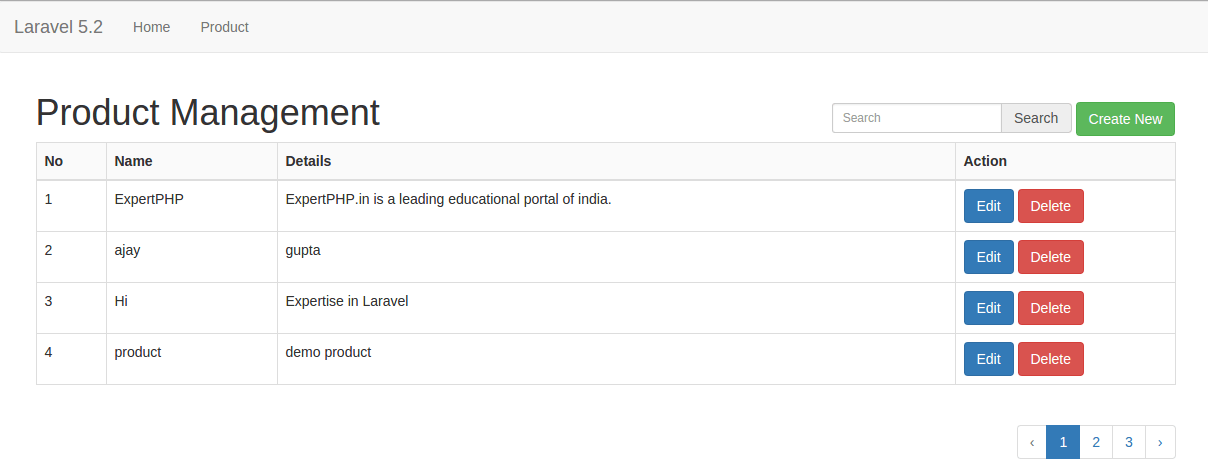
I am going to explain how to create a single module with Laravel CRUD (Create, Read, Update, Delete) application.Kindly follow each step to create a simple CRUD application.I assure you, if you follow these steps properly then you won't get any error.In this CRUD application, you can add new product, edit those products, view product details and delete product.
Before going to start, kindly let you know following things :- Know about PHP OOP Concept, Click here to know Basic concept of Object Oriented Programming
- What is resource route ?
- How to validating request data ?
If Laravel is not installed in your system then first install with following command and get fresh Laravel project.
composer create-project --prefer-dist laravel/laravel blog "5.2.*"
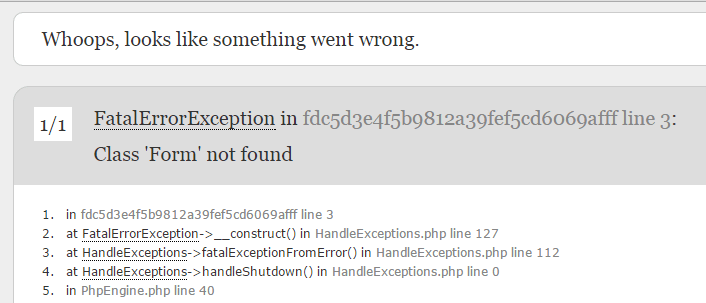
When you run above command then it create application with name blog in your system.From Laravel 5, you have to install laravelcollective/html for Form class.To know the installation process of laravelcollective/html, kindly go through this url HTML/FORM not found in Laravel 5?.
Step 2: Create products table and modelFollow the simple step to create products table in your database.First create migration for products table using Laravel 5 php artisan command,so first run this command -
php artisan make:migration create_products_tableAfter this command, you will see a migration file in following path database/migrations and you have to simply put following code in migration file to create products table.
- use Illuminate\Database\Schema\Blueprint;
- use Illuminate\Database\Migrations\Migration;
- class CreateProductsTable extends Migration
- {
- public function up()
- {
- Schema::create('products', function (Blueprint $table) {
- $table->increments('id');
- $table->string('name');
- $table->text('details');
- $table->timestamps();
- });
- }
- public function down()
- {
- Schema::drop("products");
- }
- }
Save this migration file and run following command
php artisan migrate
After create `products` table, yor should create model for product table.Create file in following path app/Product.php and put bellow couple of code in Product.php file:
app/Product.php
- namespace App;
- use Illuminate\Database\Eloquent\Model;
- class Product extends Model
- {
- public $fillable = ['name','details'];
- }
To handling request, you need to create route for products CRUD, so just add resource route in your routes file.I added resource route because it will add index, show, create, show and delete routes automatically.So put bellow line of code in your route file.
app/Http/routes.php
- Route::resource('productCRUD','ProductCRUDController');
Now we will create ProductCRUDController in following path app/Http/Controllers, all routes will manage by this ProductCRUDController.php file.
app/Http/Controllers/ProductCRUDController.php
- namespace App\Http\Controllers;
- use Illuminate\Http\Request;
- use App\Http\Controllers\Controller;
- use App\Product;
- class ProductCRUDController extends Controller
- {
- /**
- * Display a listing of the resource.
- *
- * @return \Illuminate\Http\Response
- */
- public function index(Request $request)
- {
- $products= Product::orderBy('id','DESC')->paginate(5);
- return view('ProductCRUD.index',compact('products'))
- ->with('i', ($request->input('page', 1) - 1) * 5);
- }
- /**
- * Show the form for creating a new resource.
- *
- * @return \Illuminate\Http\Response
- */
- public function create()
- {
- return view('ProductCRUD.create');
- }
- /**
- * Store a newly created resource in storage.
- *
- * @param \Illuminate\Http\Request $request
- * @return \Illuminate\Http\Response
- */
- public function store(Request $request)
- {
- $this->validate($request, [
- 'name' => 'required',
- 'details' => 'required',
- ]);
- Product::create($request->all());
- return redirect()->route('productCRUD.index')
- ->with('success','Product created successfully');
- }
- /**
- * Display the specified resource.
- *
- * @param int $id
- * @return \Illuminate\Http\Response
- */
- public function show($id)
- {
- $product= Product::find($id);
- return view('ProductCRUD.show',compact('product'));
- }
- /**
- * Show the form for editing the specified resource.
- *
- * @param int $id
- * @return \Illuminate\Http\Response
- */
- public function edit($id)
- {
- $product= Product::find($id);
- return view('ProductCRUD.edit',compact('product'));
- }
- /**
- * Update the specified resource in storage.
- *
- * @param \Illuminate\Http\Request $request
- * @param int $id
- * @return \Illuminate\Http\Response
- */
- public function update(Request $request, $id)
- {
- $this->validate($request, [
- 'name' => 'required',
- 'details' => 'required',
- ]);
- Product::find($id)->update($request->all());
- return redirect()->route('productCRUD.index')
- ->with('success','Product updated successfully');
- }
- /**
- * Remove the specified resource from storage.
- *
- * @param int $id
- * @return \Illuminate\Http\Response
- */
- public function destroy($id)
- {
- Product::find($id)->delete();
- return redirect()->route('productCRUD.index')
- ->with('success','Product deleted successfully');
- }
- }
Now we will create blade file for listing, create, edit, show, form, default (which is master template).According to standard structure of Laravel, we create new layouts folder/directory in following path resources/views and create default.blade.php within that folderresources/views/layouts/.
resources/views/layouts/default.blade.php
- <!DOCTYPE html>
- <html lang="en">
- <head>
- <meta charset="utf-8">
- <meta http-equiv="X-UA-Compatible" content="IE=edge">
- <meta name="viewport" content="width=device-width, initial-scale=1">
- <title>Laravel CRUD</title>
- <link href="https://cdnjs.cloudflare.com/ajax/libs/twitter-bootstrap/4.0.0-alpha/css/bootstrap.css" rel="stylesheet">
- </head>
- <body>
- <div class="container">
- @yield('content')
- </div>
- </body>
- </html>
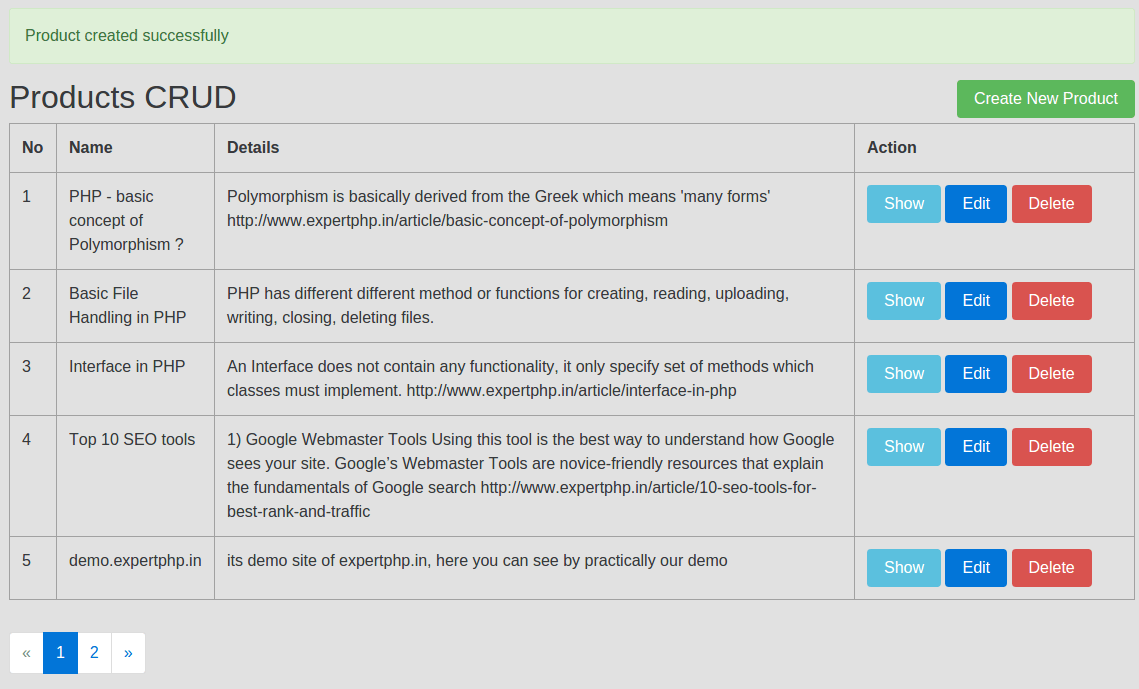
Now we will create layout for product listing, for this we will create seperate directory name ProductCRUD which contain files related products functionality and create index.blade.php file within resources/views/ProductCRUD/.
resources/views/ProductCRUD/index.blade.php
- @extends('layouts.default')
- @section('content')
- <div class="row">
- <div class="col-lg-12 margin-tb">
- <div class="pull-left">
- <h2>Products CRUD</h2>
- </div>
- <div class="pull-right">
- <a class="btn btn-success" href="{{ route('productCRUD.create') }}"> Create New Product</a>
- </div>
- </div>
- </div>
- @if ($message = Session::get('success'))
- <div class="alert alert-success">
- <p>{{ $message }}</p>
- </div>
- @endif
- <table class="table table-bordered">
- <tr>
- <th>No</th>
- <th>Name</th>
- <th>Details</th>
- <th width="280px">Action</th>
- </tr>
- @foreach ($products as $product)
- <tr>
- <td>{{ ++$i }}</td>
- <td>{{ $product->name}}</td>
- <td>{{ $product->details}}</td>
- <td>
- <a class="btn btn-info" href="{{ route('productCRUD.show',$product->id) }}">Show</a>
- <a class="btn btn-primary" href="{{ route('productCRUD.edit',$product->id) }}">Edit</a>
- {!! Form::open(['method' => 'DELETE','route' => ['productCRUD.destroy', $product->id],'style'=>'display:inline']) !!}
- {!! Form::submit('Delete', ['class' => 'btn btn-danger']) !!}
- {!! Form::close() !!}
- </td>
- </tr>
- @endforeach
- </table>
- {!! $products->render() !!}
- @endsection
Now we create new blade file to add new product within ProductCRUD folder
resources/views/ProductCRUD/create.blade.php
- @extends('layouts.default')
- @section('content')
- <div class="row">
- <div class="col-lg-12 margin-tb">
- <div class="pull-left">
- <h2>Add New Product</h2>
- </div>
- <div class="pull-right">
- <a class="btn btn-primary" href="{{ route('productCRUD.index') }}"> Back</a>
- </div>
- </div>
- </div>
- @if (count($errors) > 0)
- <div class="alert alert-danger">
- <strong>Whoops!</strong> There were some problems with your input.<br><br>
- <ul>
- @foreach ($errors->all() as $error)
- <li>{{ $error }}</li>
- @endforeach
- </ul>
- </div>
- @endif
- {!! Form::open(array('route' => 'productCRUD.store','method'=>'POST')) !!}
- @include('ProductCRUD.form')
- {!! Form::close() !!}
- @endsection
Now we create new blade file to edit product within ProductCRUD folder
resources/views/ProductCRUD/edit.blade.php
- @extends('layouts.default')
- @section('content')
- <div class="row">
- <div class="col-lg-12 margin-tb">
- <div class="pull-left">
- <h2>Edit Product</h2>
- </div>
- <div class="pull-right">
- <a class="btn btn-primary" href="{{ route('productCRUD.index') }}"> Back</a>
- </div>
- </div>
- </div>
- @if (count($errors) > 0)
- <div class="alert alert-danger">
- <strong>Whoops!</strong> There were some problems with your input.<br><br>
- <ul>
- @foreach ($errors->all() as $error)
- <li>{{ $error }}</li>
- @endforeach
- </ul>
- </div>
- @endif
- {!! Form::model($product, ['method' => 'PATCH','route' => ['productCRUD.update', $product->id]]) !!}
- @include('ProductCRUD.form')
- {!! Form::close() !!}
- @endsection
Now we create a new blade file form.blade.php within ProductCRUD folder
resources/views/ProductCRUD/form.blade.php
- <div class="row">
- <div class="col-xs-12 col-sm-12 col-md-12">
- <div class="form-group">
- <strong>Name:</strong>
- {!! Form::text('name', null, array('placeholder' => 'Name','class' => 'form-control')) !!}
- </div>
- </div>
- <div class="col-xs-12 col-sm-12 col-md-12">
- <div class="form-group">
- <strong>Details:</strong>
- {!! Form::textarea('details', null, array('placeholder' => 'Details','class' => 'form-control','style'=>'height:100px')) !!}
- </div>
- </div>
- <div class="col-xs-12 col-sm-12 col-md-12 text-center">
- <button type="submit" class="btn btn-primary">Submit</button>
- </div>
- </div>
At Last we create a blade file to show the product details
resources/views/ProductCRUD/show.blade.php
- @extends('layouts.default')
- @section('content')
- <div class="row">
- <div class="col-lg-12 margin-tb">
- <div class="pull-left">
- <h2> Show Product</h2>
- </div>
- <div class="pull-right">
- <a class="btn btn-primary" href="{{ route('productCRUD.index') }}"> Back</a>
- </div>
- </div>
- </div>
- <div class="row">
- <div class="col-xs-12 col-sm-12 col-md-12">
- <div class="form-group">
- <strong>Name:</strong>
- {{ $product->name}}
- </div>
- </div>
- <div class="col-xs-12 col-sm-12 col-md-12">
- <div class="form-group">
- <strong>Details:</strong>
- {{ $product->details}}
- </div>
- </div>
- </div>
- @endsection


.jpg)